


Introduction to Star Projectors
Star projectors have gained immense popularity in recent years due to their ability to bring the beauty of the night sky indoors. These devices can transform any room into a mesmerizing celestial experience. Whether you are looking to create a calming atmosphere in a bedroom or add an eye-catching element to a home theater, star projectors offer a unique and engaging solution.
How Star Projectors Work
Star projectors typically use a combination of LED lights, lasers, and optical lenses to project detailed images of stars, planets, and other celestial bodies onto walls and ceilings. Here’s a breakdown of the key components:
- LED Lights: Provide the primary illumination and can produce a variety of colors.
- Lasers: Add sharpness and definition to the projections, often used for creating highly detailed star patterns.
- Optical Lenses: Magnify and focus the light, ensuring a clear and accurate image projection.
Types of Star Projectors
There are several types of star projectors available, each catering to different needs and preferences:
-
Basic Star Projectors:
- Ideal for children or casual use.
- Often feature simple, easy-to-use controls.
- Typically project basic star patterns and colors.
-
Advanced Star Projectors:
- Suitable for enthusiasts or educational purposes.
- Offer more detailed and accurate celestial simulations.
- Include additional features like customizable settings, built-in speakers, and mobile app integration.
-
Planetarium Star Projectors:
- Designed for serious stargazers and educators.
- Replicate a planetarium experience with high precision.
- May include real-time tracking of celestial events and deep sky objects.
Benefits of Using Star Projectors
Using star projectors can offer a range of benefits, from enhancing the ambiance of a space to serving educational purposes. Some notable advantages include:
- Relaxation and Stress Relief: The calming effect of a starry night can help reduce stress and promote relaxation.
- Educational Value: Great for teaching astronomy and sparking interest in space and science.
- Aesthetic Appeal: Adds a visually stunning element to any room, perfect for parties or romantic evenings.
By incorporating a star projector into your space, you can enjoy a stellar experience without ever stepping outside. Whether for relaxation, education, or pure visual enjoyment, these devices offer something for everyone.
Why Invest in a Star Projector?
Investing in a star projector transforms your space into a celestial sanctuary. Here are compelling reasons to consider making this investment:
Enhance Sleep Quality
A star projector creates a calming atmosphere that can help improve your sleep quality. Imagine falling asleep under a canopy of twinkling stars, which can aid relaxation and reduce stress levels.
Educational Tool
Star projectors can be an exceptional educational tool for both children and adults. By displaying constellations and celestial bodies, they provide an engaging way to learn about astronomy and the night sky.
Ambience and Aesthetic Appeal
Adding a star projector to your room enhances the overall ambiance and aesthetic appeal. The soft glow and intricate designs can replace traditional night lights, creating a unique and visually pleasing environment.
Versatile Uses
Whether for a romantic evening, a kids’ sleepover, or a meditation session, star projectors are extremely versatile. They can adapt to various settings and moods, making them a multifunctional addition to your home.
Stress Relief
Observing a simulated night sky can be incredibly soothing. The gentle light and slow movements can help reduce anxiety and create a sense of peace.
Low Maintenance
Modern star projectors require minimal maintenance. LED technology ensures long-lasting performance, and many models are user-friendly, with simple controls and settings adjustments.
Advanced Features
Many star projectors come with advanced features, including multiple lighting modes, timers, and connectivity options like Bluetooth and smartphone apps. These features enhance usability and provide a customizable experience.
Suitable for All Ages
Star projectors appeal to people of all ages. Whether you’re looking to spark a child’s imagination or seeking a unique decor element for yourself, they cater to a broad audience.
Tech-Savvy Options
Some models incorporate cutting-edge technology, such as augmented reality, allowing you to interact with the starry sky in new and innovative ways. This can make learning and relaxation more engaging.
Budget-Friendly Choices
The market offers a range of star projectors to suit various budgets. From basic models that are easy on the wallet to high-end versions with a plethora of features, there’s an option for everyone.
Investing in a star projector brings numerous advantages, from enhancing relaxation and sleep quality to providing an educational and aesthetically pleasing addition to your home.
Understanding Different Types of Star Projectors
Understanding the various types of star projectors can enhance your celestial experience. Each type offers unique features tailored to different needs and preferences. Here are the primary types:
1. Planetarium Star Projectors
These projectors often resemble the ones found in professional planetariums. They are designed to provide an accurate representation of the night sky.
- Accuracy: High level of detail and accuracy.
- Features: May include rotating functions and the ability to zoom in on particular celestial objects.
- Usage: Ideal for educational purposes and star enthusiasts.
2. Laser Star Projectors
Laser star projectors offer a mesmerizing light show that can transform any room into a cosmic space.
- Visual Effects: Provide visually striking displays with moving animations.
- Range: Many come with options to adjust colors and patterns.
- Atmosphere: Perfect for parties and relaxation.
3. LED Star Projectors
These projectors use LED lights to create a starry night effect. They are known for energy efficiency and durability.
- Brightness: Adjustable brightness levels.
- Versatility: Suitable for children’s rooms and casual use.
- Portability: Often portable, making them easy to use in different locations.
4. Home Planetarium Kits
Home planetarium kits are designed for a more hands-on learning experience. They typically come with accompanying educational materials.
- Interactivity: Some models require manual setup and adjustment, offering an educational DIY experience.
- Educational Value: Often includes star charts and guides.
- Use Case: Great for homeschooling and family activities.
5. Smartphone-Controlled Star Projectors
These projectors offer modern capabilities with app control, providing great convenience and enhanced features.
- Smart Features: Operate via smartphone apps, enabling fine-tuned control over display settings.
- Customization: Ability to download different star maps.
- Convenience: Suitable for tech-savvy users who prefer smart home integrations.
Understanding the specifics of each type can help you make an informed decision tailored to your needs, ensuring you choose the right star projector for your cosmic journey.
Key Features to Look for in a Star Projector
Choosing the right star projector can greatly enhance your stargazing experience. Here are the key features you should consider:
Brightness and Clarity
- Adjustable Brightness Levels: Ensure the projector allows you to dim or brighten the stars to match the ambiance and your room’s lighting.
- High-Definition Optics: Look for projectors with HD optics for sharper and clearer star projections.
Projection Range and Coverage
- Wide Coverage: Opt for a projector that can cover a large area, ideally 100 square feet or more, to fill your room with stars.
- Projection Distance: Check the effective projection distance to ensure it can project clearly whether placed near or far from surfaces.
Variety of Star Patterns and Constellations
- Preset Patterns: Choose a model with a variety of preset star patterns or constellations to diversify the viewing experience.
- Customizable Features: Some projectors allow you to create and save your star patterns, adding a personal touch.
Built-In Speaker and Sound Effects
- Quality Sound System: Some star projectors come with built-in speakers for playing soothing space-themed music or ambient sounds.
- Integration with Music: Check if it syncs with your music to enhance the overall atmosphere.
Ease of Operation
- Remote Control: A remote can make it easier to adjust settings without disturbing the viewing experience.
- User-Friendly Interface: Look for intuitive controls and simple interfaces for hassle-free operation.
Power Source and Portability
- Battery-Powered Options: If you need portability, consider battery-operated projectors or those with rechargeable batteries.
- Power Adapter: Ensure it includes a power adapter if you prefer a continuous power supply.
Timer and Automatic Shut-Off
- Adjustable Timer: Useful for falling asleep under the stars, set it to automatically turn off after a set period.
- Energy-Saving: An auto shut-off feature helps conserve energy and enhances safety.
Extra Features
- Laser vs. LED: Decide between laser projectors for more defined star points or LED projectors for a gentle glow.
- App Compatibility: Modern models offer app control for enhanced customization and easy updates.
Choosing a star projector with these key features will ensure you have an immersive and enjoyable stargazing experience right from your home.
Setting Up Your Star Projector: A Step-by-Step Guide
Follow these steps to set up your star projector efficiently:
-
Unbox Your Projector:
- Carefully remove all components from the box.
- Ensure you have the projector, power adapter, remote control, and any included accessories.
-
Choose the Perfect Spot:
- Locate a flat and stable surface in your room.
- Ensure the spot has easy access to a power outlet.
-
Connect the Power Adapter:
- Plug one end of the power adapter into the projector.
- Insert the other end into a nearby power outlet.
-
Adjust the Projector Placement:
- Aim the projector toward the ceiling or wall.
- For best results, place it about 3-4 feet from the surface you want to project onto.
-
Turn On the Projector:
- Press the power button on the projector or use the remote control.
- Wait for the projector to fully initialize.
-
Set Desired Modes:
- Use the remote control or buttons on the projector to select modes.
- Options may include star patterns, nebula effects, and timer settings.
-
Customize Brightness and Colors:
- Adjust the brightness levels to suit your room’s ambiance.
- Select your preferred colors or cycle through multiple color settings.
-
Sync with Music (if applicable):
- Connect your device to the projector’s Bluetooth (if available).
- Play music to sync the projection effects with your tunes.
-
Experiment and Enjoy:
- Test different settings and positions.
- Enjoy the stellar experience and adjust as needed for the best view.
Remember to keep the user manual handy for troubleshooting tips and detailed information about your specific model.
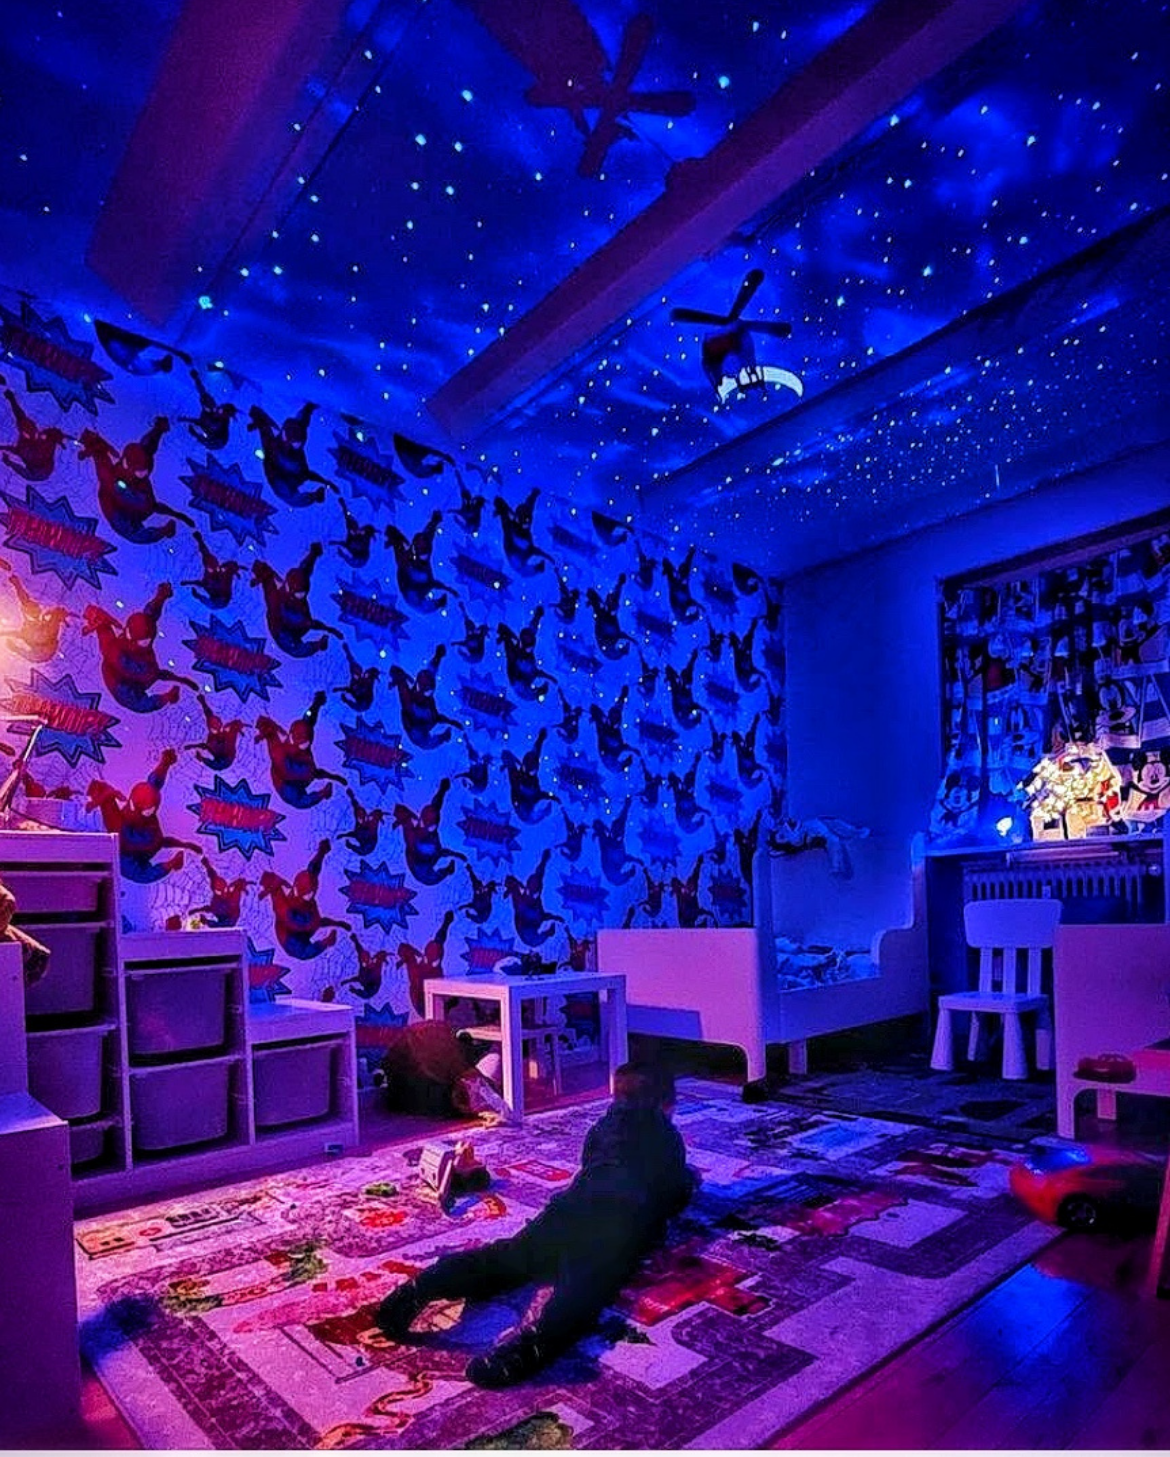
Choosing the Best Location for Optimal Viewing
When setting up your star projector, selecting the right location is key to maximizing your viewing experience. Consider the following factors:
1. Ambient Lighting
- Minimize Light Pollution: Choose a room where you can control ambient light. Dimming or turning off lights will enhance the visibility of the stars.
- Curtains and Blinds: Use blackout curtains or blinds to prevent street lights and other external lights from interfering.
2. Surface and Positioning
- Flat Surface: Ensure the projector is placed on a stable, flat surface. This can be a table, shelf, or any horizontal plane.
- Ceiling and Walls: For the best effect, aim the projector at a light-colored, smooth ceiling or wall to reflect the stars clearly.
3. Viewing Angles
- Seating Arrangement: Arrange your seating to face the projection directly. This ensures everyone has an unobstructed view.
- Height Adjustment: Position the projector at an appropriate height—neither too high nor too low. This will prevent distortion and cover more surface area.
4. Room Size and Setup
- Room Dimensions: Larger rooms offer more space for broader projections. Ensure your projector has the range to cover the entire space.
- Furniture Arrangement: Position furniture to avoid shadows. Keep open spaces for unobstructed projection.
5. Power and Connectivity
- Easy Access to Outlets: Make sure the location has access to a power outlet. Utilize extension cords if necessary.
- Wi-Fi and Bluetooth: If your projector has smart features, ensure it is within range of your Wi-Fi or Bluetooth devices.
6. Quiet and Private
- Noise Reduction: Choose a quiet room away from household noise. Soft background music can enhance the experience but avoid loud disturbances.
- Privacy: Select a private space where you can relax without interruptions. Your backyard during a clear night might also be an excellent choice.
Selecting the right location will significantly enhance your star-gazing experience. Prioritize these factors for a captivating and immersive celestial display.
Enhancing Your Experience: Additional Accessories
Interchangeable Star Discs
One way to amplify the versatility of your star projector is by investing in interchangeable star discs. These discs can depict different celestial scenes, ensuring that your visual experience remains fresh and exciting. Popular options include:
- Constellation maps – Perfect for educational purposes.
- Nebula scenes – Adds a colorful, otherworldly appeal.
- Planetary views – Offers a close-up look at the planets in our solar system.
Advanced Remote Controls
Enhance convenience by opting for an advanced remote control. This accessory allows you to:
- Adjust brightness – Instantly dim or brighten the projections.
- Change colors – Switch between various hues to match your mood.
- Set timers – Automatically turn off the projector after a predetermined time.
Many advanced remotes even come with built-in laser pointers, ideal for highlighting specific stars or constellations.
Mounting and Stands
Proper placement of your star projector is crucial for achieving the best visual effect. Consider the following mounting options:
- Tripod stands – Provides stability and easy adjustability.
- Ceiling mounts – Ideal for permanent installations in home theaters or children’s rooms.
- Wall brackets – Offers a space-saving solution without compromising the viewing angle.
Audio Integration
To create a fully immersive experience, consider incorporating some form of audio integration. Options include:
- Bluetooth speakers – Sync these with your projector to play soothing background music.
- Built-in sound systems – Some high-end models come with integrated speakers, offering a cohesive audio-visual experience.
- Smart home devices – Sync your projector with devices like Amazon Echo or Google Home to control the audio through voice commands.
Smart Home Compatibility
Modern star projectors often come with smart home functionality. This allows seamless integration into your existing smart home ecosystem, enabling features such as:
- Voice control – Use commands through Alexa or Google Assistant.
- App-based control – Manage settings directly from your smartphone.
- IFTTT compatibility – Set up intricate routines and triggers involving multiple smart devices.
Each of these accessories can significantly elevate your star projector demonstrations, ensuring you captivate and impress your audience every time.
Common Issues and Troubleshooting Tips
Using a star projector should be a magical experience, but sometimes technical issues can arise. Here’s how to troubleshoot some common problems:
Projector Won’t Turn On
- Check Power Source: Ensure the projector is plugged in properly or has fresh batteries.
- Power Button: Hold the power button for a few seconds. Some models need a longer press to power up.
- Fuse Check: Some projectors have internal fuses. Refer to the manual to see if a fuse replacement is necessary.
Poor Image Quality
- Lens Cleaning: Use a soft, lint-free cloth to clean the lens. Dust or smudges can distort the image.
- Focus Adjustment: Adjust the focus knob or dial to achieve a sharper image.
- Distance and Angle: Ensure the projector is placed at the optimal distance from the surface and is angled correctly.
Flickering or Dim Lights
- Battery Check: Replace the batteries if they are low or depleted.
- Power Supply: Ensure the power cable is not damaged or loose.
- Bulb Health: Some projectors use bulbs that dim over time. Consider replacing the bulb if it’s old.
Overheating
- Ventilation: Make sure the projector’s vents are not blocked. Provide adequate ventilation.
- Usage Time: Do not use the projector continuously for extended periods. Allow it to cool down periodically.
No Sound (For Models with Built-In Speakers)
- Volume Check: Verify that the sound is not muted or set to a very low level.
- Connection Cables: Ensure all audio cables are securely connected.
- Bluetooth Connection: If using Bluetooth, confirm the device is paired correctly.
Remote Control Issues
- Battery Replacement: Replace the batteries in the remote control.
- Line of Sight: Ensure the remote is pointed directly at the projector sensor and there are no obstructions.
- Range Check: Use the remote within the effective range specified in the manual.
Unresponsive Buttons
- Soft Reset: Turn off the projector, unplug it, wait a few minutes, and then power it back on.
- Factory Reset: Refer to the manual for instructions on performing a factory reset, if available.
Sync and Compatibility Issues
- Firmware Update: Check for any firmware updates for your projector model.
- Device Compatibility: Ensure your device is compatible with the projector specifications.
Regular maintenance and prompt troubleshooting can ensure your star projector creates a stellar experience every time you use it.
Maintaining and Cleaning Your Star Projector
Regular maintenance and cleaning of your star projector will ensure it functions smoothly and provides the best visual experience. Follow these steps for proper upkeep:
Basic Cleaning
- Turn Off and Unplug: Before cleaning, make sure your star projector is turned off and unplugged to prevent any electrical hazards.
- Dust Removal: Use a soft, dry cloth to wipe the exterior. Avoid using wet or abrasive cloths that could scratch the surface.
- Lens Care: Clean the lens gently with a microfiber cloth. If there are stubborn smudges, use a lens-cleaning solution recommended for cameras or eyeglasses.
Deep Cleaning
- Access Internal Components: Refer to your user manual to carefully open the projector if internal cleaning is necessary. Not all projectors require this step.
- Compressed Air: Use a can of compressed air to blow dust out of the internal components. Hold the can upright to avoid releasing any liquid.
- Avoid Water: Never use water or liquid cleaners on the internal parts of the projector as this can damage the circuitry.
Maintenance Tips
- Avoid Overheating: Ensure that the star projector is placed in a well-ventilated area. Overheating can shorten its lifespan.
- Check for Firmware Updates: Some modern star projectors have smart features. Check periodically for firmware updates to maintain optimal performance.
- Lamp Replacement: If your projector uses a replaceable bulb, follow the manufacturer’s instructions on when and how to replace it.
Storage
- Safe Storage: When not in use, store the star projector in a cool, dry place. Use the original packaging if possible to protect it from dust and physical damage.
- Cover It: If the projector is to be left in place, use a dust cover to protect it from dirt and debris.
Troubleshooting Common Issues
- Dim Projection: If the stars appear dim, check the bulb and clean the lens. Ensure there is no ambient light affecting the projection.
- No Power: Confirm that the power source is functional. Check for any loose wires or blown fuses inside the projector if applicable.
- Uneven Star Patterns: This might indicate misalignment. Refer to the alignment instructions in the manual for adjustments.
Taking care of your star projector will not only prolong its life but also ensure a stellar experience every time you use it. Regular maintenance can prevent most issues and keep your device running smoothly.
Reviews of Top Star Projectors on the Market
When choosing a star projector, you should consider various factors such as brightness, ease of use, and additional features. Here are some top-rated star projectors to help you make an informed decision:
1. Sega Homestar Original Planetarium
The Sega Homestar Original Planetarium offers high-quality projections and a realistic night sky atmosphere.
Pros:
- Projects over 60,000 stars
- Adjustable viewing angles
- Timer function for automatic shutoff
Cons:
- Higher price point
- Limited portability due to size
2. Laser Stars
Laser Stars bring a colorful and dynamic projection experience with the use of laser technology.
Pros:
- Vivid, shimmering star effects
- Easy setup and operation
- Wide projection coverage
Cons:
- Green laser can be too bright in dark rooms
- Regular calibration needed
3. BlissLights Sky Lite
BlissLights Sky Lite stands out with its soothing nebula effect and simple design.
Pros:
- Compact and lightweight
- Easy-to-use controls
- Good for relaxation and ambiance
Cons:
- Limited star detail
- Basic functionality without timer
4. SOAIY Aurora Night Light
The SOAIY Aurora Night Light combines star and aurora projections for a mesmerizing experience.
Pros:
- Multiple light modes and colors
- Built-in speaker for music playback
- Remote control included
Cons:
- Light can be dim in large rooms
- Speaker quality may not satisfy audiophiles
5. Uncle Milton Star Wars Death Star
For Star Wars fans, the Uncle Milton Star Wars Death Star projector projects stars along with iconic images from the franchise.
Pros:
- Star Wars-themed projections
- Easy to use for kids and adults
- Affordable price
Cons:
- Limited projection area
- Basic star detail compared to high-end models
6. YSD Night Lighting Lamp
The YSD Night Lighting Lamp is versatile and budget-friendly, perfect for children’s rooms.
Pros:
- Affordable price
- Multiple projection themes
- Battery and USB powered options
Cons:
- Plastic build may feel less durable
- Limited projection quality
7. National Geographic Astro Planetarium
This projector offers realistic star projections and educational components.
Pros:
- Engaging and educational content
- Accurate star map projections
- High-quality build
Cons:
- Learning curve for optimal setup
- May be pricier than basic models
Consider your needs and preferences when selecting your star projector. Each model has unique strengths, so choose the one that aligns best with your desired experience.
DIY Star Projector Ideas and Tutorials
Gather Basic Materials
Start with collecting essential items for your DIY star projector:
- A cardboard box or a shoebox
- A small LED light or a flashlight
- A piece of black construction paper
- Scissors, tape, and glue
- A toothpick or pin for making holes
Simple Star Projector
- Cut a circular hole in one side of the box for the LED light or flashlight to fit.
- Wrap the box with black construction paper to prevent light leakage.
- With a toothpick or pin, create small holes in the black paper to represent stars. The more holes you make, the denser your star field.
- Cover the hole with the paper, tape it securely, and place the LED light inside the box, facing outward through the hole.
Advanced Constellation Projector
For a more intricate design:
- Obtain a cylindrical box or a Pringles can.
- Cut off both ends, leaving just the cylinder.
- Create constellation patterns on black cardstock. Punch out the stars’ positions using a pin.
- Wrap the cardstock around one open end of the cylinder. Use tape to secure it.
- Place an LED candle or small flashlight inside the cylinder. The light should project the constellations on your walls and ceiling.
Smartphone Star Projector
Using a smartphone app:
- Download a star map app that displays constellations.
- Find a magnifying glass; its lens can help project the image more clearly.
- Create a projection box using a shoebox and black paper.
- Position the smartphone at one end and the magnifying glass at the other end.
- Adjust until the star map projects clearly on your ceiling or wall.
Tips for Enhancing Your Star Projector
- Use colored LED lights for a more realistic experience.
- Apply some glow-in-the-dark paint to your stars for added effect.
- Try various materials like frosted plastic or glass for different projection clarity.
Explore these ideas to create your stellar experience, right from home!
Creating Themed Nights with Your Star Projector
Transform an ordinary evening into a magical experience with themed nights using your star projector. By planning engaging themes, you’ll immerse yourself, family, or friends in a stellar atmosphere.
Choose a Theme
Consider various theme options:
- Galactic Adventure: Turn your living room into a space expedition. Project images of planets, stars, and galaxies, creating a journey through the cosmos.
- Romantic Evening: Create an ambiance of love under the constellations. Soft lighting and gentle star projections can enhance a romantic dinner.
- Educational Night: Design an informative night where you explore astronomy facts. Utilize the star projector to point out constellations and share stories about their origins.
- Relaxation Retreat: Use calming star patterns paired with relaxing music. This is perfect for unwinding after a long day or meditative sessions.
Setting Up
To ensure that the themed night goes as planned, follow these steps:
- Preparation: Select your projector settings based on the theme. Adjust brightness and speed to suit the mood.
- Decor: Align your room decor with the chosen theme. For example, use moon phase posters for a Galactic Adventure or candles for a Romantic Evening.
- Soundtrack: Curate a playlist that enhances the theme. Space sounds or love songs can complement and elevate the experience.
- Interactive Elements: Incorporate activities or discussions linked to your theme. For Educational Night, consider having a telescope on hand or books about space.
Immersive Details
Enhance the themed night with additional touches:
- Food & Drinks: Serve theme-related snacks and beverages. For a Galactic Adventure, you could offer “space” food packets or star-shaped cookies.
- Costumes: Dress up to match the evening’s theme. Astronaut suits for space exploration, or comfy robes for a relaxation retreat.
- Lighting: Besides the projector, use complementary lighting such as LED candles or dimmable lamps.
Creating themed nights with your star projector can turn any evening into an extraordinary event. By paying attention to themes, settings, and interactive elements, you can host unforgettable experiences.
The Science Behind Star Projections
Understanding how star projectors work begins with the basic principles of optics and astronomy. The core mechanism is usually based on LED or laser technology, which emits bright light. This light is then filtered through specialized optics to generate the starry patterns on the ceiling or walls of your space.
Key Components and Technologies
-
LED and Laser Light Sources:
- LEDs: Offer various colors and are energy-efficient.
- Lasers: Provide a highly focused and intense light.
-
Optical Lenses:
- Concave and convex lenses are used to adjust the focus and spread of the light.
- Some advanced models come with interchangeable lenses for different effects.
-
Rotational Mechanisms:
- Motors: Enable the slow rotation of the star patterns, mimicking the movement of the night sky.
- Adjustable speeds: Allow you to control the pace of the rotation to match your preferences.
-
Projection Films and Discs:
- Star Maps: Accurate depictions of constellations based on astronomical data.
- Creative Designs: Themes like galaxies, nebulae, and more.
-
Software Integration:
- Apps: Some projectors come with mobile apps for easy customization.
- Firmware updates: Enhance features and improve performance over time.
How Star Patterns Are Generated
- Star Maps: Many projectors use scientifically accurate star maps. These maps are often based on real astronomical data, ensuring an accurate representation of the night sky.
- Customizable Settings: You can often adjust the intensity, colors, and rotational speed to mimic natural and even fantasy night skies.
- Projection Distance: By adjusting the distance between the projector and the surface, you can change the clarity and size of the projections.
Why Understanding the Science Matters
Grasping the science behind star projections enhances your appreciation of the technology and allows you to make informed choices. Whether you’re aiming to create a calming atmosphere or an educational experience, knowing the workings behind your star projector ensures you get the most out of your stellar experience.
Future Innovations in Star Projector Technology
When exploring the future of star projectors, you can expect a host of exciting advancements. First, AI integration will likely play a significant role. Imagine a projector that can customize your starry sky based on your preferences, mood, or even the time of year.
Potential Features to Look For:
- Advanced AI Customization: Allows you to tailor the star display to show constellations relevant to specific dates or historical events.
- Interactive Features: Imagine being able to point at a constellation and receive detailed information about it right from your projector.
- Voice Control: Simplifies the user experience. You can say, “Show me Orion,” and the projector will automatically adjust to display that constellation.
Enhanced Visual Experience:
Expect substantial improvements in visual quality. Upcoming models are likely to include:
- 4K Resolution: Sharper and more detailed star projections.
- Augmented Reality (AR) Integration: Overlays celestial information in real-time, providing a more immersive experience.
- Dynamic Range Expansion: Improved color accuracy and brightness, for a more vivid sky simulation.
Connectivity Options:
Future star projectors will offer better connectivity options, making them more versatile and user-friendly:
- Smart Home Integration: Connect seamlessly with home automation systems like Alexa or Google Home.
- Wi-Fi and Bluetooth Compatibility: Allowing for easy updates and content streaming.
- Mobile App Control: Manage and customize projections from your smartphone.
“Technology is moving at an incredible pace,” says a tech analyst. “The advancements in star projectors are a fascinating example of how even niche products become more sophisticated over time.”
Safety and Sustainability
With environmental concerns on the rise, future star projectors are expected to incorporate greener technologies. Expect:
- Energy-efficient LEDs: Reduce power consumption while providing brilliant visuals.
- Recyclable Materials: More eco-friendly production methods to lower the carbon footprint.
In adopting these future innovations, your star projector will not only dazzle your senses but also contribute to a more sustainable world. Imagine a device so versatile and immersive that watching the stars becomes a truly futuristic experience.
Conclusion: Bringing the Night Sky Indoors
When you bring a star projector into your home, you’re not just purchasing a gadget—you’re transforming your living space into a celestial haven. This device can turn any ordinary room into a captivating display of the cosmos, perfect for relaxation, education, or even just enhancing the ambiance.
Key Benefits of Star Projectors
- Relaxation and Stress Relief: Imagine lying on your bed after a long day and turning on your star projector. The soft, twinkling lights can help ease your mind and reduce stress.
- Educational Value: Star projectors serve as an excellent educational tool for you and your family. They offer an interactive way to learn about constellations, planets, and celestial events.
- Unique Home Decor: These projectors can serve as an innovative addition to your home decor. Whether you choose a minimalist design or a whimsical style, they add a unique flair to any room.
- Versatility: Modern star projectors often come with various features such as adjustable brightness, multiple light modes, and even integration with smart home systems. This makes them highly adaptable to different needs and preferences.
Choosing the Right Star Projector
When selecting a star projector, consider the following:
- Projection Quality: Ensure the device provides a sharp and clear projection of stars and constellations.
- Features: Look for additional features such as adjustable brightness, auto-off timers, and compatibility with smart home devices.
- Ease of Use: Opt for a user-friendly interface that makes it easy to switch between different modes and settings.
- Durability: Check for build quality and warranty options to ensure the projector lasts a long time.
Setting Up Your Star Projector
- Placement: Position your star projector in the center of the room or near a wall for the best projection.
- Adjust Settings: Customize the brightness and projection angles to suit your preferences.
- Ambiance: Create a cozy atmosphere by pairing the star projector with soft background music or aromatherapy diffusers.
“A room full of stars is not just a scene, it’s an experience waiting to be embraced.”
By carefully choosing and setting up your star projector, you can enjoy the wonders of the night sky from the comfort of your home, making every evening a new adventure in your own stellar sanctuary.
